How to Create Tile Groups on the Windows 10 Start Menu

The Windows 10 Start menu is highly customizable and one of the things you can do is arrange app tiles into groups. Here’s how.
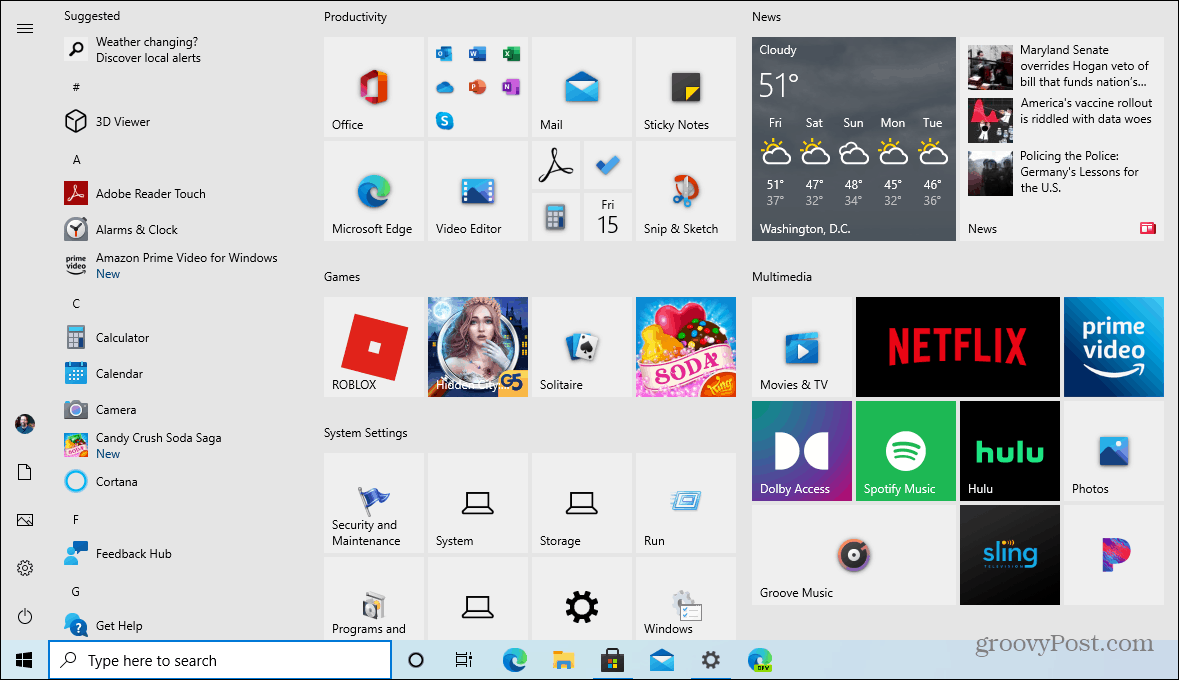
If you are coming from Windows 7 to Windows 10, you’ll notice a big change to the Start menu. When you open the Start menu on Windows 10, you will find app “tiles” on the right-hand side. Some of them are “live” and display animated updates like the News and Weather apps, for example.
Other app tiles and system items are static and just display what they are. For instance, 7-zip or other file archiving apps, or if you pin system settings to the Start menu, those tiles won’t be live.
There is a lot of customization you can do with tiles on the Start menu. One of those is arranging them into individual groups. Here’s a look at how to do it.
Tile Groups on the Start Menu in Windows 10
When you first get started with Windows 10, you will see some tiles are already in groups. For example, you will see a “Productivity” and “Explore” group of app tiles. You can easily add more tiles to those existing groups by dragging them to an existing group.
The process is similar to rearranging icons on your smartphone. I am moving the Microsoft News tile from the “Explore” group to the “Productivity” group in the example below.

Create Your Own Tile Groups on the Start Menu
But let’s take a look at creating a new custom group of tiles. Just drag the tiles you want in a group to an open area of the Start menu. In the following example, I pinned some system settings to Start and made a group of system settings tiles. I dragged everything I wanted into an open area of the Start menu.

Then to give your tile group a name, hover the pointer over the group, and you will see “Name group” pop up.

Click on Name group, and it will open a field so you can type in whatever name you want to give your group of tiles.

Note: An easy way to get started organizing your live tiles is to expand the Start menu, so it’s a bit larger. Just click and drag the edges of the menu like you would when resizing the Start menu. That gives you more room to operate and organize everything.
Resize Start Menu Tiles
Keep in mind that you can resize tiles on the Start menu, too. This allows you to organize and arrange the tiles in your group to your liking. To do that, right-click a tile and choose Resize and select from small, medium, large, or wide.

Pin Apps to Start
Note that not all installed apps will create a tile on the Start menu. So to get everything in place, you’ll probably need to pin some of your installed apps to the Start menu. To do that, drag an app from the Apps column on the left side to a tile group on the right. Or, you can right-click an app from the list and click Pin to Start, then move the tile where you want it.

Move Entire Tile Groups
After creating a group, you can move the whole thing to where you want it on the Start menu. Just click the group’s name bar and drag it where you want. For example, here I am dragging the System Settings group closer to the top.

Summing Up
That’s all there is to it. In the shot below, I have created a few tile groups to have an idea of what you can do. It’s also worth noting that I added a fourth column of tiles to the Start menu in this example.
I have never really relied on the Start menu much in previous versions of Windows, but in Windows 10, I am finding it intuitive and actually fun to use. What do you think of the new Start menu in Windows 10?
totohawk
August 3, 2015 at 9:35 am
Thank you for this great little intro and tips to start menu icons!!!
Post an article if you’ve found a way to move desktop icons to other desktops on Windows 10 similar to moving apps on smartphones.
Kate
October 29, 2015 at 6:22 pm
So you said here that you made a new group, I’m wondering how to do that? I can’t seem to find any way at all to create a new header/group label/title. You said you did it, but how?
Rocco
November 4, 2015 at 10:29 am
Drag an icon to an empty area and it should auto make a new group
rivardadu
November 30, 2015 at 1:32 am
I finally figured it out too, it just wasn’t explicitly explained here.
One first has to have an app IN the tile pane area.
So, the first step is to click Start, All Programs, find the program/app shortcut, then click-drag it to copy it to a blank area in the tile pane, until you see a horizontal bar appear, then release the mouse button.
Here is the trick that no one writes….
While that horizontal bar hides itself from view, IT IS STILL THERE!
So HOVER in the space immediately above the icon you just put into tile pane, and you’ll see the outline of the group name box appear.
Click IN the box area, then a white text area appears, and you can type the group name that you desire.
Robert
December 21, 2016 at 8:40 am
This is spot on!. Why Microsoft can’t walk people through these simple steps is beyond me. Seems backwards. Why not have an option to create a Group first and then drag icons into the group?
Brion
November 27, 2015 at 8:42 pm
Hello. I am one of the minority that loved the windows 8 live tiles. I have a dual monitor setup and always had the start live tiles on teh right with the news, email, and all programs tiled how i wanted, On the left monitor i did my work and could drag stuff to the right screen if needed.
Now, when I have tiles on the right screen, whenever I move to the screen and click on something they disappear.
Any fix for that?
Eric
March 13, 2018 at 5:37 am
Suggestions I see here for how to create a new group, along with test results on my system:
* Click in open space. (Doesn’t work.)
* Hover over area at top of open space. (Doesn’t work.)
* Drag icon to open space. (Works.)
Nathan Sokalski
September 7, 2018 at 9:16 am
Something that I would like to do (or maybe I should say not do) is name my group. I view the Live Tile area of the Start Menu as a place for my most commonly used apps, so I attempt to make it reasonably small and use only one group. Because it is only one group, I have no desire to name it, yet the area where the group name would be is still there (using up unnecessary space). Is there a way to create just one anonymous group that does not have or display a name?
Sharlie Huffman
May 21, 2021 at 9:50 am
I can drag one of the apps I want in a new group to a blank area but it is always below one of the groups that came with the machine. There is no line above it unless you count a wide blue horizontal one that disappears as soon as you let go of the cursor. The app then lands right under whatever other app is there (at the bottom of whatever group it is). Hovering over any part of the app or above it does not find the line or bring up anything.