How to Perform a Clean Install of Windows 10
A while ago we showed you how to get a Windows 10 ISO for a clean install. Today we’ll show how to clean install Windows 10 from beginning to end.
A while ago, we showed you how to get a Windows 10 ISO for a clean install. Today we’ll go in-depth on how to fully perform a clean install of Windows 10 from beginning to end.
Also, take a look at our article on how to clean install Windows 11.
Step 1. Configuring your computer’s BIOS*
Start by inserting your Windows 10 installation media into the PC — this can be a DVD or USB flash drive. If you haven’t created it yet, read our article on how to create a Windows 10 USB flash drive. Now restart the computer and enter the BIOS (F2, F9, F12, or Del on most PCs).

After pressing the correct key, navigate to the Boot section of the BIOS using the right arrow key.
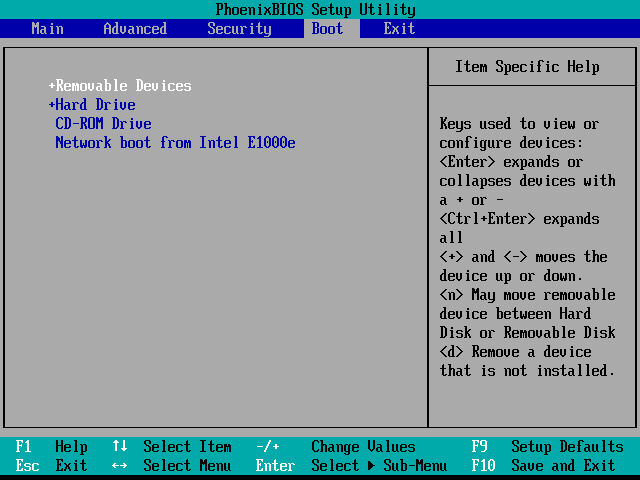
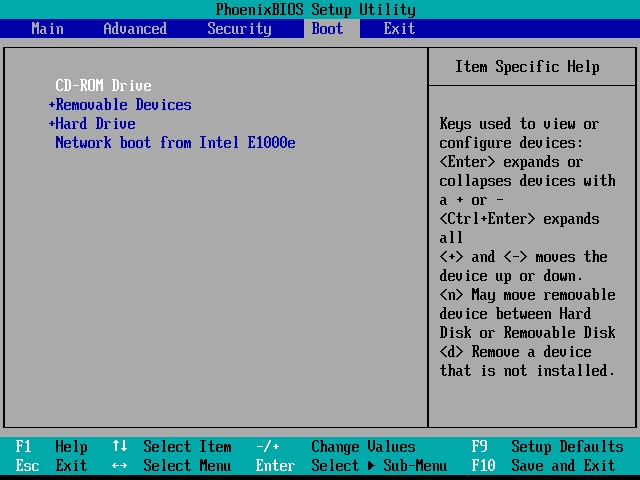
The controls of each BIOS are usually displayed at the bottom (unless you’re lucky enough to have a GUI BIOS – in which case you’ll be able to use the mouse to navigate). Use these to navigate to the device from which you will install Windows and place it at the top. I’ll be using a DVD, so I’ll place “CD-ROM Drive” at the top. If you use a USB drive, you should move “USB Device” or “Removable Devices” to the top.
Once you’re done with changing the boot order, use the right arrow key to move to the Exit section of the BIOS. From there, you’ll want to select “Exit Saving Changes” followed by a Yes or “y.”
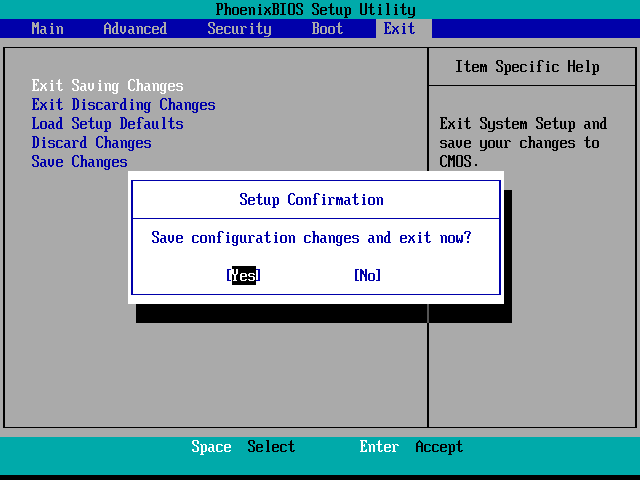
After this, your computer should be able to restart straight into the Windows installer.
Step 2. Installing Windows 10
After rebooting, you should see the Language select screen. From here, select your desired language, time and currency format, and keyboard input. Then press Next to continue.

On the next screen, press the “Install now” button.

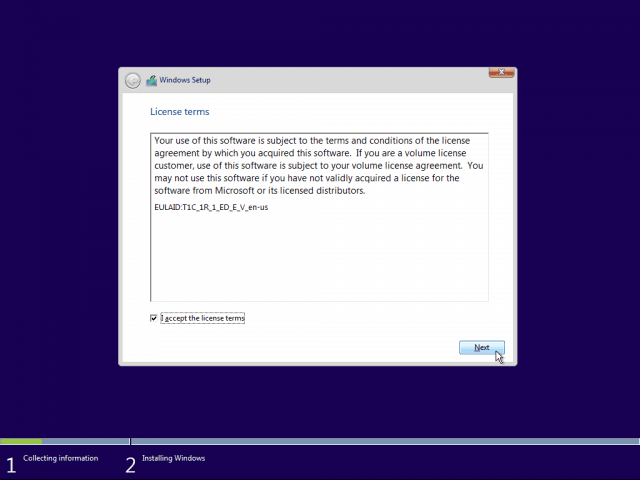
You’ll need to agree to the Microsoft EULA before you can continue. Read it (…or not) and tick the checkbox before pressing “Next.”
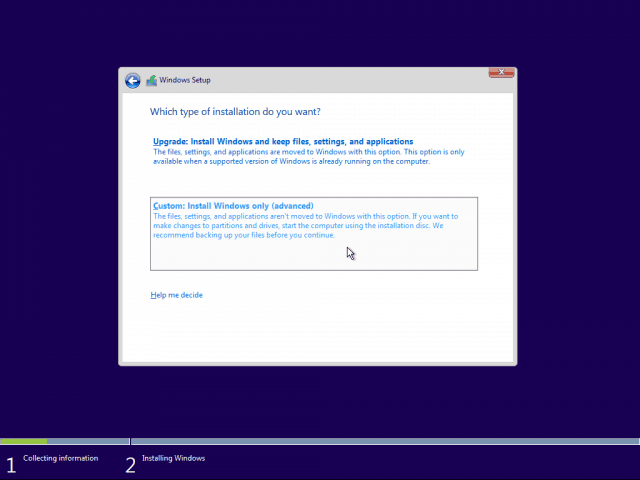
To perform a clean install, you’ll need to select the “Custom: Install Windows only” option. As the installer says — you should have a backup of your files and programs to copy them to the new installation after it’s complete.
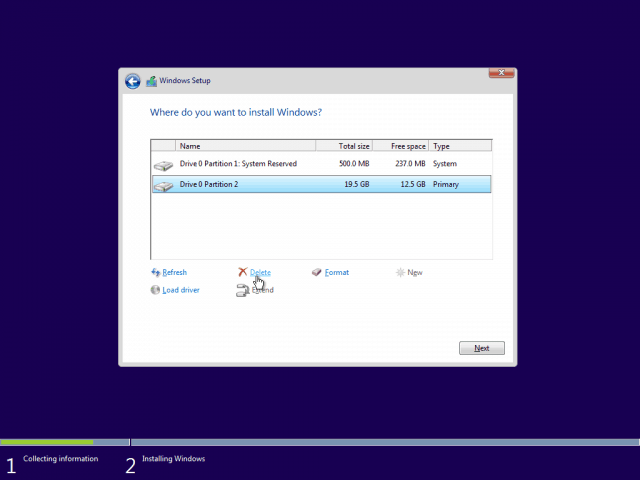
This next part may be a bit tricky if you have multiple hard drives or partitions. You’ll need to delete the primary partition and the system partition. To ensure a 100% clean install, it’s better to fully delete these instead of just formatting them.
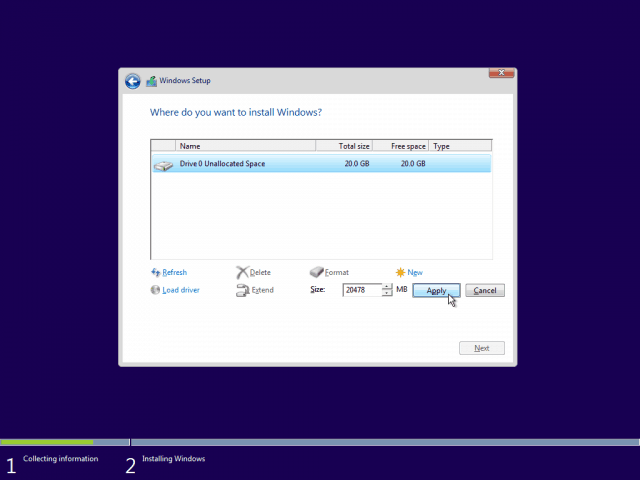
After deleting both partitions, you should be left with some unallocated space. Select it and click the “New” button to create a new partition.
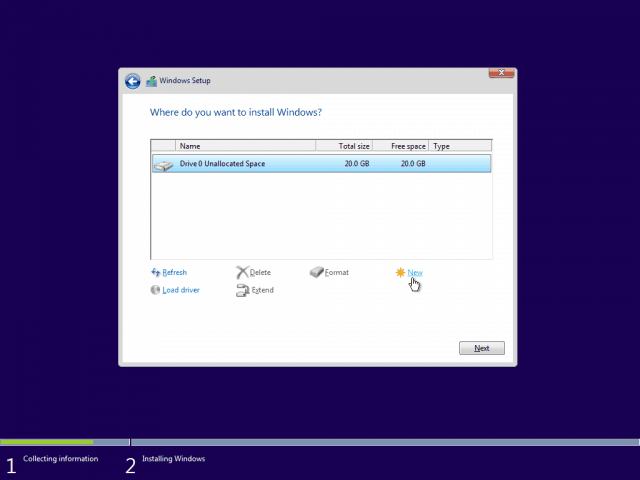
By default, Windows inputs the maximum available space for the partition. I’d advise you to leave the size as-is and press “Apply.”
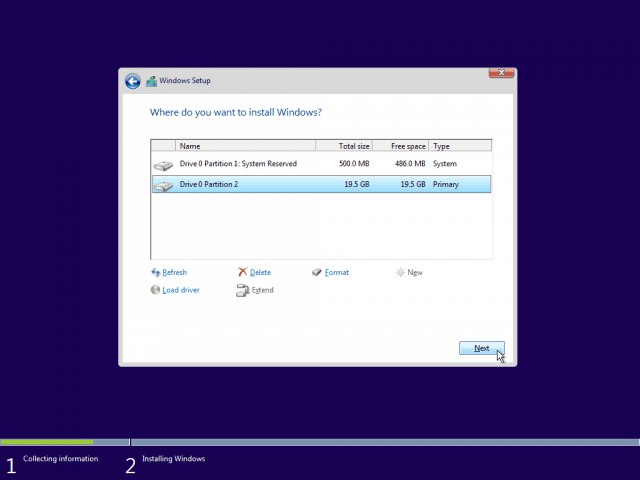
After creating the new partition(s), select the primary one and press “Next.”
The Windows setup should now begin. Clean installs are usually significantly faster than upgrades, so you should get from this…
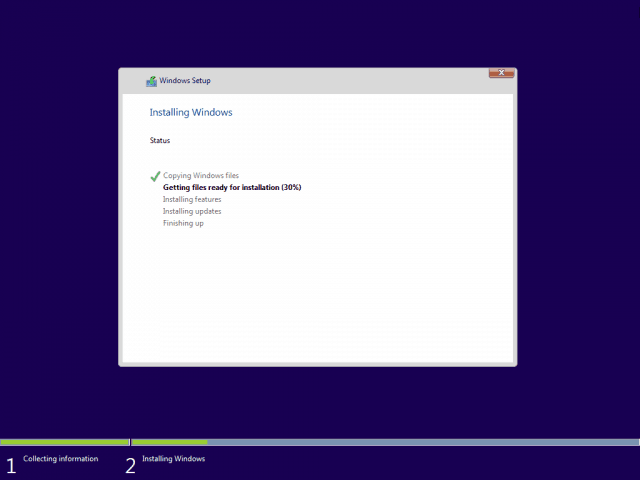
… to this in a matter of minutes.

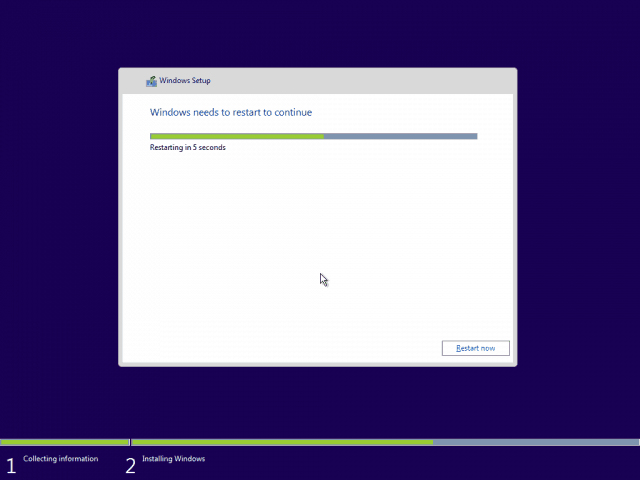
After “Finishing up,” you will be notified that Windows will now restart.
Step 3. Configuring Windows
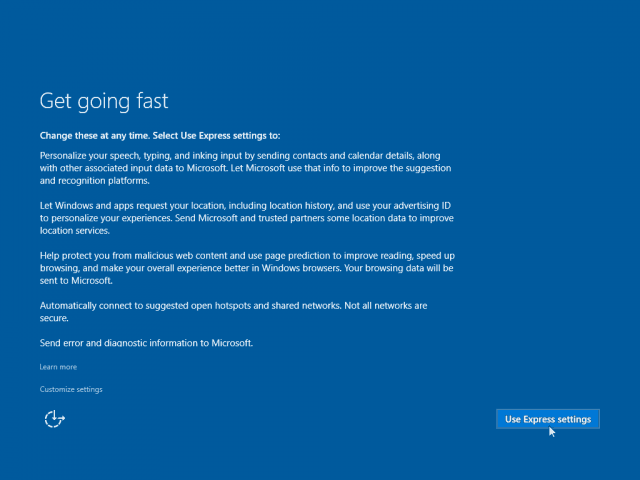
After the reboot, you should be greeted by the following screen. The default Windows 10 settings are excellent and don’t really mess with your privacy, so we advise you to Use Express settings. Optionally, you can also Customize the settings if you insist on turning some features off.
Windows will now go through a few setup procedures.
Once you reach this screen, fill in your new account details and press Next.

Windows will now go through the final steps of setting up…
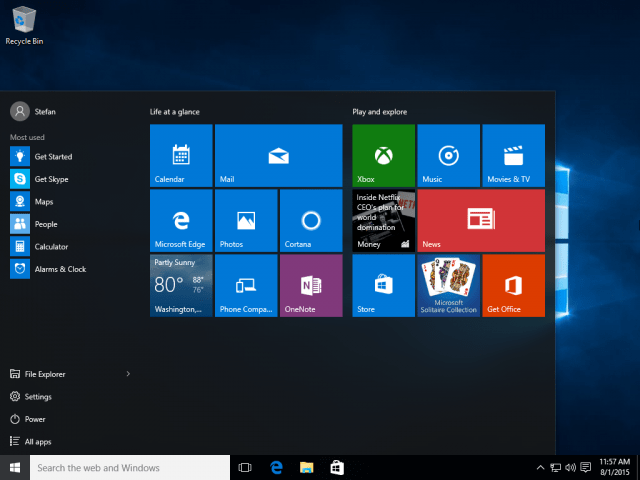
…and will boot straight to the Desktop afterward. Congrats!
What now?
You’ll have a lot to see in Windows 10 – from configuring general settings to checking out the new and exciting features. Here are a few articles you can check out right away:
- Windows 10 Tip: Find Apps by First Letter from Start Menu
- Windows 10 Tip: Add or Remove System Icons to the Desktop
- Windows 10 Tip: Pin Specific Settings to Start Menu
- Windows 10 Tip: Pin Websites from Edge Browser to Start Menu
- Windows 10 Tip: Pin Favorite Music Playlists to Start Menu
- Windows 10 Tip: Enable and Create a System Restore Point
- How to Create Live Tile Groups in Windows 10 Start Menu
- Add Gmail and Other Email to Windows 10 Mail & Calendar
- Make Windows 10 Mail App Sync More Frequently
- Windows 10 Tip: Make Edge Browser Open to Multiple Web Pages
- How to Set Default Apps in Windows 10
- How to Enable Hibernate Mode in Windows 10
- How to Create a Windows 10 USB Recovery Drive
- Transfer iTunes Playlists to Windows 10 Music App
- Make Windows 10 File Explorer Open to This PC Instead of Quick Access
- Add More Folder Locations to Windows 10 Start Menu


Joe L
August 3, 2015 at 8:09 am
I have windows 10 Pro installed on my main computer. Will this clean setup reinstall the Pro version? Also how about the program’s currently installed? Will I have to reinstall them? I’m not worried with saved data, files, pictures etc as they are on cloud storage systems.
Thank you
Joe L
Stefan
August 3, 2015 at 9:23 am
The installed version of Windows depends entirely on the ISO used. As far as I’m aware the ISOs from the Windows website are for Windows 10 Pro so there’s no need to worry. You will need to reinstall your programs, however – all your data will be erased from the PC, too.
Joe L
August 3, 2015 at 5:14 pm
Stefan.
Thank you for your reply. I was hoping I wouldn’t have to re-install office 2010. It’s a little behind the times, but it’s bought and paid for, but I lost the authorization key. Guess I’ll have to contact Microsoft.
Cho
August 3, 2015 at 11:17 am
Activation?……….Do you end up with an “activated” install or no?
Damien
August 3, 2015 at 4:10 pm
I performed a clean install of Windows 10, without first upgrading from my previous version of Windows 8.1. This resulted in a ‘Activate Windows’ watermark on the bottom right corner of my screen.
After reading a few things online, I find out (too late of course), that I should have upgraded Windows via Windows Update, then do a clean install.
Tried calling Microsoft, they just said wait 2 days, then call back if it still hasn’t activated.
Apparently their servers are being inundated and can barely keep up.
Wasn’t a problem when I upgraded to Windows 10 using Windows Update on a different laptop.
Hopefully Windows 10 will activate automatically, otherwise I’ll have to get back onto Microsoft to see what they can do, or restore Windows 8 and update it, then clean install.
Brian Burgess
August 3, 2015 at 4:37 pm
Thanks for the comment @Damien. Hopefully this will remind others that the best method to verifying your system is activated — do the upgrade FIRST.
Then again, I have heard of people that have done exactly what you did, and, the advice MS gave you is apparently correct…after a couple of days, it will be activated.
Also, you can do a clean install of Windows 8.1 or 7 SP1, and then do the upgrade…which is basically a clean install….
Make sure to come back and let us know how things turn out!
Nikhil
February 9, 2016 at 1:42 am
On my laptop, I have to change the boot order from BIOS. There is no option during startup to boot from pen drive. So should I just remove the pen drive while the laptop is restarting ( after installing windows 10 ) to avoid the setup starting up again ? Or something else?
joyce miller
March 15, 2016 at 8:36 am
I need to start windows 10 over again so I can input the correct info from the get go. The email address I input initially was wrong.
Adrian
October 19, 2017 at 5:32 pm
Thank you for this!!! Lifesaver!!!
Tommaso
May 31, 2018 at 1:43 pm
Everything’s fine till Step 2, after that I get the Lenovo logo and stuck on it.
Suggestion?
mommabeans
January 27, 2019 at 11:20 am
We have an Acer cloudbook that recovery is not working on. So we tried this. Problem is, there are 4 partitions on this drive. System, MSR, Primary and Recovery. Should we be deleting all of them? Which ones? None? What’s the deal here?
Jim Glimmer
May 27, 2019 at 9:12 am
Do I have to install all my chipset drivers ect after the clean install?
Charles
June 5, 2019 at 7:42 am
Thanks for the best instructions I have found so far. However you do not go over the part where the install requests a Microsoft Product Key, I have tried many and none work any help or advise is greatly appreciated thanks Charles in Arizona
Cz
April 16, 2020 at 2:50 am
What do i do because I have two primary partitions when i reach the level of choosing where to install….
And when i select each of them seperately,the option of deleting them is unavailable
Imasterpro
December 2, 2021 at 9:07 pm
useful and guide to follow. Thank you
Brian
April 8, 2023 at 8:24 am
Brilliant, you made an old fella very happy! Was struggling with usb rescue
Kim
June 9, 2023 at 5:44 pm
Best walkthrough for this info! Went to several places before this clear as mud. This one was clear! Thank you. =]
Mez
August 26, 2023 at 12:53 am
I deleted my system partition and now my computer just blue screen of death loops this post bricked my computer now I can’t do anything at all
Steve Krause
August 26, 2023 at 7:04 am
Hi Mez,
If you’re doing a Clean install of Windows 10 (Starting from scratch,) you need to delete your system partition. You do this only after you BOOT from the Windows 10 (or 11) DVD or USB drive because Windows will auto-create the partition again for you and re-install Windows.
If you follow the steps, you will be fine. I’ve done it a million times.
If you’re still having issues, post your issue with screenshots to forum.groovypost.com
Steve
groovyPost.com