Complete Guide to Taking Screenshots On PC, Mac and Mobile Devices

Need to know how to capture screenshots on your mobile device or computer? This complete guide will provide the answers for Windows, Mac, Android and more.
Ever wanted to know how to capture screenshots on your mobile device or computer? This complete guide will provide the answers. Screenshots are images of on-screen items, such as the interface or a portion of it. With the plethora of devices and form factors, capturing a screenshot varies.
Capturing Screenshots from Your Devices
Windows
There are multiple ways to capture a screenshot natively in Windows or using third-party tools. I use a mix of native functions in Windows and a third-party app.
To capture the active screen in Windows, press the Print Screen button on your keyboard. If you just want to capture the active window, press Alt + Print Scrn. If you are using a laptop, you might not be able to use that command; try using Fn + Prt Scn. To capture the active window, use the Fn + Alt + Print Scrn.
Captured screenshots will be saved to the Windows Clipboard or into the Screenshots folder under Pictures in File Explorer. You can paste the image into your favorite programs, too. One of the most common is Microsoft Paint. If you are writing an article or creating a presentation, you can immediately paste the image there.
The Windows 10 Creators Update adds a new command for capturing screenshots even faster. Similar to the macOS command + shift + 3, Windows 10 users can press the Windows key + Shift + S, then make a selection. Screenshot selections will be saved to the clipboard; you will need to open a program such as Paint 3D or similar, then paste it there.

How to Take a Screenshot in Office and Insert It into a Document
Since the release of Windows Vista, Microsoft has included a screen capture program called the Snipping Tool. You can use it to capture portions of the screen or a window. Click Start, type: snipping tool then hit Enter.
To capture a screenshot, click the New button, this will fade the screen. Then, drag the mouse over what you want to take a shot.
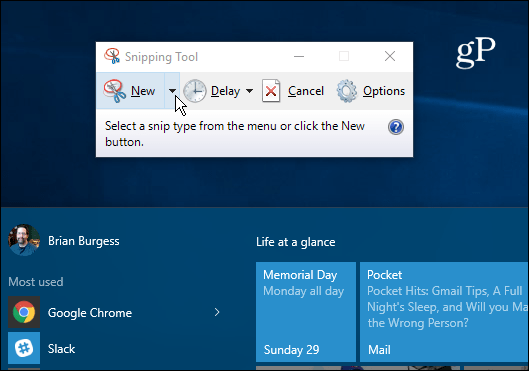
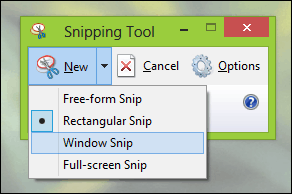
If you want to capture a screenshot of a particular part of the screen, such as a window or the entire screen, click the sub menu beside the new button, then choose one of the available options.
The captured screenshot will appear in the full Snipping Tool program. You can proceed to save the image, copy it for use in another application, email it, or edit the picture.
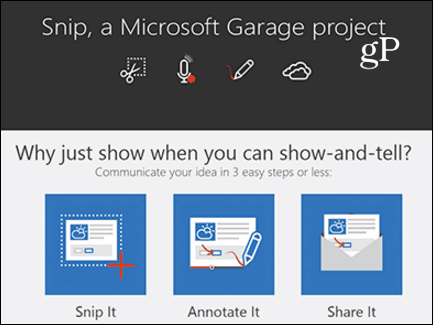
Another tool I have been using a lot lately to capture screenshots is the Snip app, which is designed for Windows 10; when enabled, Snip It maps standard print screen commands. You can use it to capture screenshots much easier, especially for on-screen elements such as context menus or an active window.
Update: I have been noticing some issues with the Snip app on Windows 10 recently. The app tends to create large log files, eating up disk space quickly. If you are experiencing issues with the app, check out our instructions for finding and deleting those log files.
Microsoft Surface
If you use a Microsoft Surface, screenshots can be captured in multiple ways. To capture the entire screen or active window, hold down the Windows button on the front of the tablet, then press the volume-down button on the left side of the device. The screen will dim for a second. You can find your screenshot within the Screenshots folder within your Pictures folder.
Some Type Covers don’t include a dedicated Print Screen key. So, instead, you can use the Fn + Windows key + Space key. To grab a screenshot of the active window, press Alt + Fn + Space.

Windows Phone
Press the Volume Up and Camera button at the same time to capture a screenshot. You can find your screenshots in the Photos app.
macOS or OS X
There are several great products out there on OS X to take screenshots. Snagit and Skitch are two of our favorites. OS X also includes powerful native methods for capturing screenshots, but it’s very keyboard-centric. The great thing I have learned is how fast and easy it is once you memorize these commands.
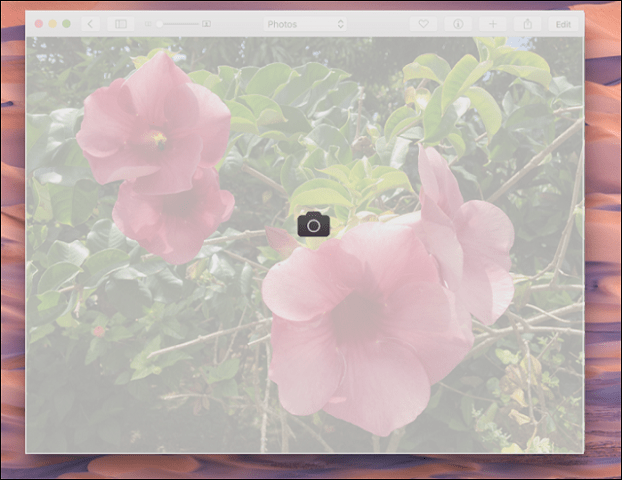
To capture an active window, press Command + Shift + 4 and then the space key; this will activate a camera icon, which you can use to select and then click a window to capture it.
If you only want to capture a portion of the screen, press Command + Shift + 3, then use your mouse to drag over a portion of the screen or window. It works similarly to the snipping tool in Windows. Screen dumps in OS X save to the desktop

iOS
You can take screenshots on Apple devices such as the iPhone, iPad, or iPod Touch by pressing the Home and Power buttons simultaneously. You can find your screenshots in Photos app within the Screenshots album.
Apple Watch
Press and hold the side button on the Apple Watch, then immediately press and release the Digital Crown. You can find it in the Photos app on your iPhone.
Android
Because of the variety of Android-powered devices, this section might not be comprehensive. For the most popular devices, such as the Samsung Galaxy, you can capture screenshots by holding down the Home and Power buttons at the same time. On Google devices that provide a pure Android experience, like the Nexus 6P or the Nexus 7 tablet, press and hold the power button and volume down rocker. Screenshots are saved to the Picture Gallery app within the Screenshots album.
On a local carrier-branded Android smartphone, I was able to capture a screenshot by pressing the Home button and Volume Up button at the same time.
Linux
On a widespread distribution such as Ubuntu, you can capture screenshots using the same Windows command Alt + Print Scrn to capture the active window or screen. Ubuntu Linux also includes a screenshot application available from the Applications Accessories menu.
Editing your screenshots
If you want to make quick edits to your screenshots, there are a variety of options depending on the device.
- You can use Microsoft Paint to make further edits, such as cropping or resizing to reduce the size of the image. The Snip app also includes tools you can use to edit and share your image quickly.
- The Photos app in Windows Phone OS can make basic edits such as cropping. Just tap the photo to activate the hidden tools. Photos in Windows 10 can also be used to edit your screenshots.
- The Image Viewer app in OS X is quite powerful; options include cropping and resizing, along with batch editing.
- Photos in iOS let you make quick edits, too. You can play with your images, such as modifying color temperature, changing from color to black and white, and cropping.
- Similar options are available on Android using the Gallery app. Tap the photo to activate hidden tools, which you can use to add effects, rotate or crop the image.
Apps such as Microsoft Edge include built-in screen-capturing tools; check out our previous article for instructions on how to activate and use them. The Windows 10 Anniversary Update adds a new feature called Ink Work Space with creative tools for capturing and editing screenshots. Managing screenshots is an important part of obtaining them. Thankfully, operating systems such as Windows and iOS recognize this. For instance, you can automatically have your screenshots backed up to OneDrive. Apps such as Dropbox also include support for uploading your screenshots, too.
Resources: How To Reset the Windows 10 Screenshot Counter
Fenoy W Butler
May 30, 2016 at 8:21 pm
When using OS X to do a screen grab shouldn’t the shortcuts be Cmd + Shift + 3 or 4 and not F3 or F4? At least that is the way it works on my MBP with 10.11.5. For example to capture a portion of the screen I simply use CMD+Shift+4 and then drag the mouse over the portion of the screen I want to capture. Release the mouse and it saves it to Dropbox’s screen capture folder.
Andre Da Costa
May 30, 2016 at 9:51 pm
Silly me, yes, it should be. My Windows brain at play. Thanks.