
Since Microsoft first announced Microsoft Azure in 2008, originally codenamed, Red Dog; the cloud-centric platform has grown into one of Microsoft’s billion dollar businesses. For users familiar with cloud computing, Azure and Amazon Web Services are key players in this industry. As a desktop user, what are the benefits of Azure, is there anything in it I could utilize? Since its inception, Microsoft has targeted Azure mostly to large enterprise customers and IT Professionals who prefer acquiring computing as a utility.
With Azure, a small, large business or government can host their infrastructure on top of Microsoft’s platform for some number scenarios; whether it’s running a merchant website, setting up a rendering farm for animating a movie, system administration such as authenticating users, offsite backup and a plethora of different activities. Redundancy, of course, is built on Azure, ensuring systems are always available. The great thing about this, you pay for only the amount of computing you can use or afford. Azure removes a lot of challenges associated with planning, building and deploying a network infrastructure then hiring human resources to manage it. For an individual, Azure has benefits too, one of which is spinning up a VM, which you can then use to host and test projects.
Host a Virtual Machine in Microsoft Azure
Why would you want to spin up a VM in the cloud, though? There are many use cases where this could add value to your business. For instance, if you are starting a business and would like to easily deploy a system for a remote worker, this a great way to do it. Users can also utilize it to test a project; even if they do not have the local machine resources to facilitate it. In this article, we show you how to setup, configure, deploy then connect to a Virtual Machine running in Microsoft Azure.
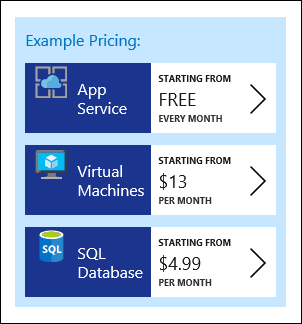
Before you can start using Microsoft Azure, you need to purchase a subscription. Microsoft offers various plans based on your needs. If you are interested in trying out Azure, you can sign up for a free trial. For this article, I will be primarily utilizing Microsoft Azure to host a virtual machine. There are different pricing options available depending on whether you want to host an application or database. Since I already have a Visual Studio MSDN Subscription, I will be utilizing the included Azure benefit.

Setup Microsoft Azure
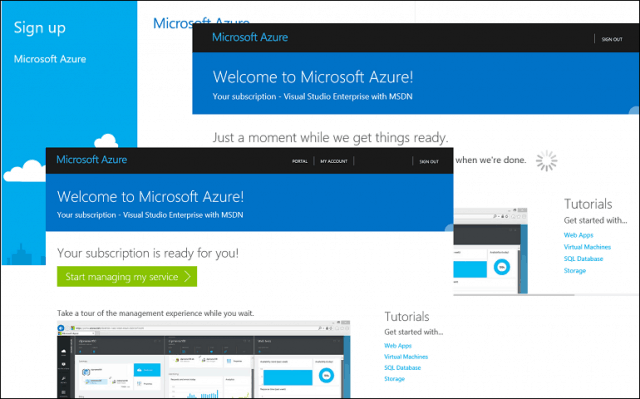
After signing into the Microsoft Azure portal, you will be taken through a setup wizard. When Azure completes your configuration, click Start Managing My Service. Wait again while Azure loads the Azure Portal.
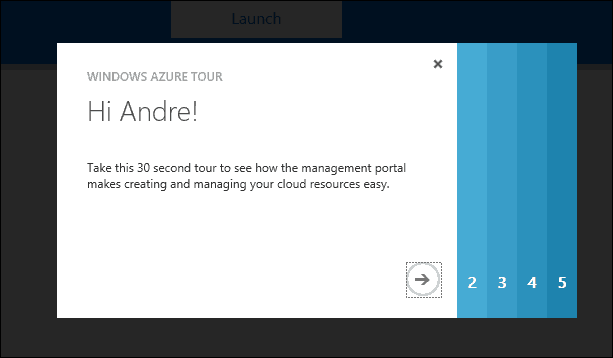
If you are new to using the service, the 30-second tour is recommended to familiarize yourself.
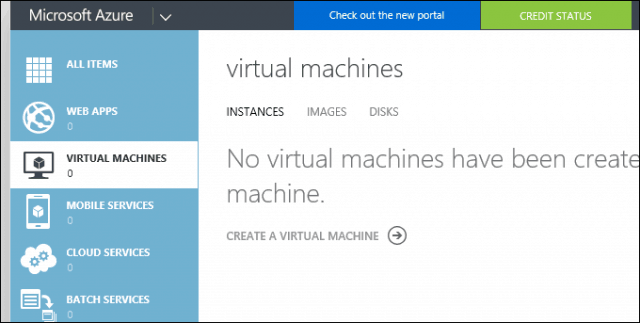
Once you have settled into the Azure Portal, you can look around and explore some of the available options. One of the favorite activities users utilize Azure for is hosting virtual machines for remote workloads. On the left, you will see links to items along with a status indicating any activities. As you can see, Azure can be used for a wide variety of tasks which includes hosting web apps, virtual machines, mobile services, cloud services, batch services, databases, storage, big data, media, software development, content delivery networks and a whole lot more.
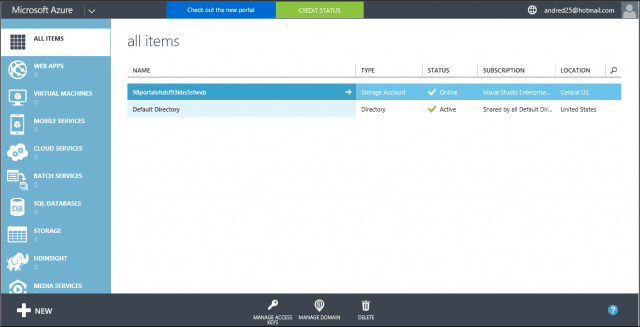
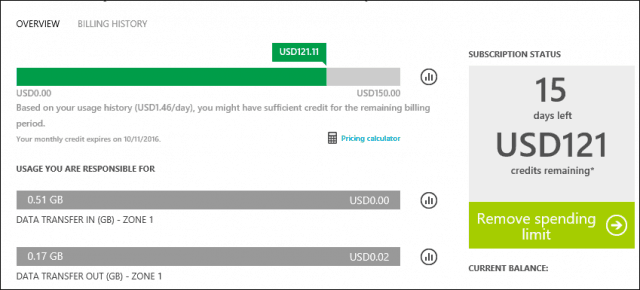
Because Azure is a subscription, you will need to manage it depending on the type of resource it is used for. At the top, you can click the Credit Status to get an overview of your balance and the utilization of your subscription.
Create A Virtual Machine
When you are ready to create a virtual machine, click the Virtual Machines tab then click Create A Virtual Machine.
Azure features a multitude of options and features for configuring your virtual machine. At the end of the day, it boils down to what you need and what you can afford. Five optimized categories are offered depending on your needs. For my specific purposes, I will be utilizing Compute. If you are storing data, hosting app services or managing network resources, then you can choose from one of the available options.

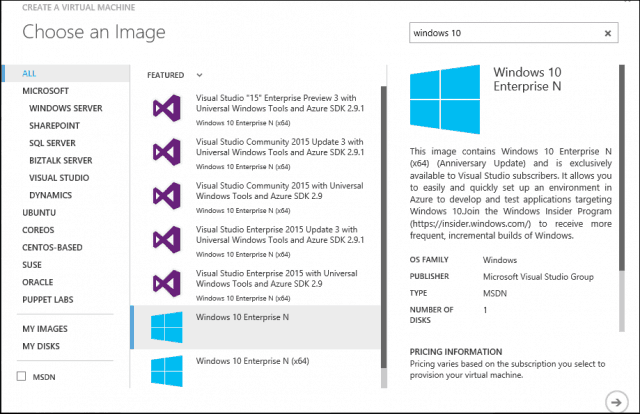
As you can also see, Azure lets you define the purpose of the category you want. You can manually create or choose from a gallery of configurations if you wish. Azure initially started out as a Windows-centric platform, but new cultural and marketing influences have encouraged Microsoft to make Azure a more open platform. You can choose from a variety of competing platforms which includes Ubuntu Linux, CentOS, Oracle, and CoreOS.
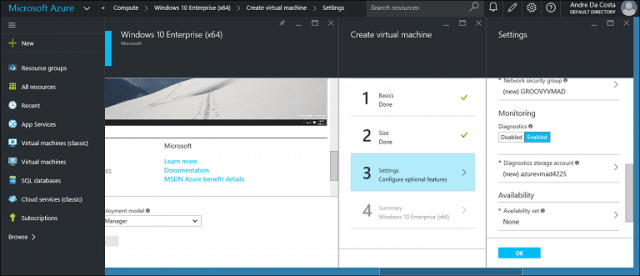
Creating your virtual machine is a four step process, which includes configuring basic settings, choosing virtual machine size, adding optional features and reviewing the summary. Basic settings consist of choosing the device name, account name, password and defining your resource group. Resource groups let you monitor your VM along with who can access and manage it.

Virtual Machine size boils down to cost, utilization, and performance. If you will be utilizing your virtual machine for a heavy workload; a higher performance virtual machine is recommended. Users on a budget can browse through the gallery to find a suitable option. For my purposes, I will go with the cheapest option available, which is a D1 Standard. This is a single core VM, 3.5 GBs of RAM and a 50 GB SSD.

Optional features didn’t have anything for me to configure, so I just skipped and went to the summary page.
Summary gives you an overview of your virtual machine configuration. If you wish to make any quick changes, you can go back and do so.

When you are ready, click OK then wait while your Virtual Machine is deployed.
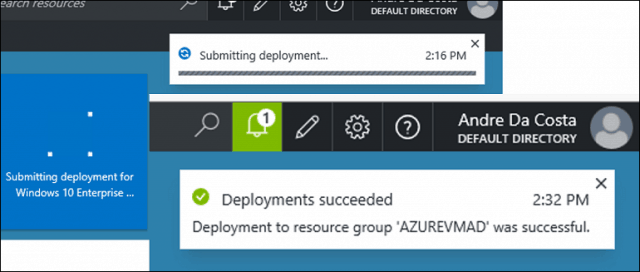
When complete, you can click configuration tab where you can make additional adjustments, view the virtual machines status or connect to it.
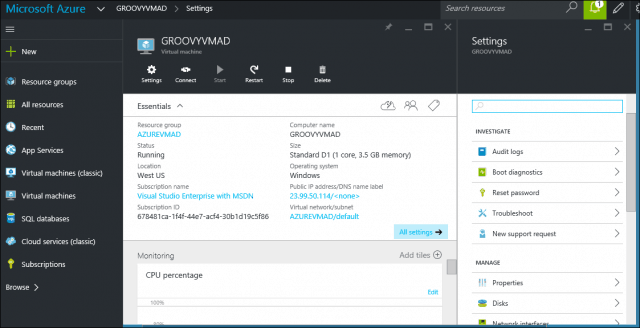
To connect to your virtual machine, click Connect. A prompt will appear on screen, click open; this will launch the remote desktop client. To log on, enter the virtual machine name, followed by an account name then your password, click OK. Your Microsoft Azure based virtual machine is now up and running.

So that’s a brief introduction to using Azure. It’s not only for large businesses, whether you are a small business, freelancer, you can use Azure too. Tell us what you think.
CAG
September 27, 2016 at 6:23 pm
Great article. Please do some follow-up articles on this topic.
Andre Da Costa
September 27, 2016 at 8:03 pm
Thanks CAG, will certainly be looking at Azure in future showcases.